Jabra Speak 710 Review

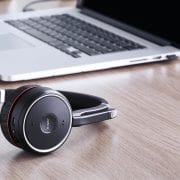
Finally got my hands on a couple of Jabra Speak 710 speakerphones. When it comes to portable USB/Bluetooth speakerphones, the Speak 710 has the best audio quality I’ve experienced.

Before I get ahead of myself, let’s go through the process.

The Jabra Speak 710 comes in two flavors:

What’s in the box? Jabra Speak 710 with a hardwired USB cable and integrated folding table stand, Link 370 USB Dongle, carry case, Quick Start Guide

Jabra Speak 710 Features:

  • Immersive sound for calls and music
  • Intuitive plug and play connectivity – connect to a laptop, smartphone and tablet via USB or Bluetooth®
  • Lightweight design, protective travel pouch, and 15 hours of battery life (3hrs to fully charge)
  • Flexible and scalable for small and large meetings
  • Interact with your voice assistant with the one-touch Smart button
  • Certified for Avaya, Cisco, and Skype for Business for a plug-and-play experience

Set Up and Use: For any Jabra US device, I strongly recommend downloading the FREE Jabra Direct software of individual use or Jabra Xpress for mass deployment.

Speak 710 Jabra Direct


Set up is a breeze. You have two options for connecting Jabra Speak 710 to PC/Laptop:

  1. Connect to PC via USB Cable (USB cable hardwired to Speak 710 and has nice cord management system)
  2. Connect to PC via Bluetooth (Link 370 USB dongle)

To connect Speak 710 to Bluetooth mobile device, hold the Bluetooth button for 2 seconds and follow the voice-guided instructions to pair to your smartphone.

Jabra Speak 710

Speak 710 controls:

  • Power on/off
  • Answer call
  • End call
  • Volume Up
  • Volume Down
  • Mute
  • Bluetooth
  • Battery status
  • Smart button
    • By default, the Smart button will activate your smartphone’s voice assistant (Siri®, Google Now™, Cortana™). However, if you would prefer the Smart button to instead speed dial a phone number on your Smartphone or PC, this can be configured using Jabra Direct.
  • Link Button
    • To temporarily link the audio between two Jabra Speak 710s, press the Link button on both speakerphones when they are within 2m/6ft. The Link button will only be visible when two Jabra Speak 710’s are within 2m/6ft.
    • To unlink the speakerphones, press the Link button on one of the speakerphones.

NOTE If two Bluetooth devices are connected to the Jabra Speak 710, the last connected Bluetooth device will be replaced by the temporary link.

The Jabra Speak 710 is a premium, portable speakerphone for business leaders and C-level executives that ensures amazing sound for conference calls and music – anytime, anywhere.

I have two Speak 710’s linked together so the audio experience is absolutely fantastic for calls and music!!!

Desktop Setup

Here are some use cases:


  • Small meeting room: 1-6 participants in the meeting room (place Speak 710 in the middle of the table)
  • Large Meeting room: Up to 12 participants (Link two Speak 710’s and place at either end of the table)
  • At your desk (Private office/home office): It’s recommended to put Speak 710 in an upright position using the integrated table stand.
  • Stereo media: if you are presenting or viewing stereo multimedia, two Jabra Speak 710’s can be positioned on either side of a projector or display for automatic stereo sound.

To help you keep track of tiny Link 370 USB dongle, there’s a slot on the underside of Speak 710 so you can store for travel.  Let’s say you forget dongle or forgot to charge…that’s okay, fortunately, there is a hardwired USB cable you can always use. The table stand is also a nice feature.

The Speak 710 is for those who need better audio quality for voice calls and streaming media. Additionally, the look of the Speak 710 is very nice compared to Speak 510.

I’ve tested all the business-grade portable USB/Bluetooth speakerphones from the major manufacturers and hands down, the Speak 710 provides the best audio quality.

Plantronics Manager Pro lifestyle

Connect a Plantronics Headset to Deskphone

“Can I use the Voyager 5200 UC or Voyager Focus UC with a desk phone?” ” Can I Connect a Plantronics Headset to Deskphone?” is another question we get. The answer is “YES!” Back in 2014 I wrote about the MDA200, fast forward to 2017 and the MDA220 has been introduced. So what’s the difference between the two, they look identical?

Plantronincs Headset to DeskphoneThe main differences:

What’s in the Box? MDA 220 Audio Switcher, Telephone Interface Cable, Quick Start Guide

Set Up and Use: First connect your Plantronics Supported corded or wireless USB headset adapter to MDAA220 USB headset port. (See list above for list of supported headsets)

Connecting to PC or Laptop: Connect the USB cable from the MDA220 to the computer. The computer talk button LED will be solid green.

Connecting to Desk Phone: There are three options for connecting MDA220 to a desk phone.

      • Desk Phone (standard) via included Telephone Interface Cable
      • There are switch settings on underside as well as Speaker and Mic volume levels
      • Desk phone + HL10 lifter and power supply (sold separately)
      • Desk phone + EHS Cable (sold separately)


Plantronics Software

The Computer Audio Button and Desk Phone Audio Button are indicated via LED Indicators on the top of the MDA220. Below is the LED Indicator light guide


I can’t stress enough the importance of downloading Poly Software or subscribing to Plantronics Manager Pro. The Asset Management capabilities are one thing, the awesome voice analytics are really great.

Plus Plantronics Hub software offers many options. You can update firmware or adjust multiple settings to support how you work.

The MDA220 is a solid solution. If you have questions, please contact your dedicated Call One, Inc. Account Executive. 1-800-749-3160

Plantronics Voyager Focus UC

Plantronics Voyager Focus UC revisited

Almost a couple years ago I wrote “Plantronics Voyager Focus UC Review”. As more and more organizations transition to open office spaces as well as work remotely from anywhere, the need for Active Noise Canceling has become increasingly important.

The Plantronics Voyager Focus UC is ideal for folks who want the ability to “Focus” on their work. Many do this by streaming their favorite tunes or podcasts via their mobile device.

There are four Plantronics Voyager Focus UC variants:

  • PLT-202652-01-006         Plantronics B825 Voyager Focus UC Bluetooth Headset
  • PLT-202652-02-006         Plantronics B825-M Voyager Focus UC Lync/Skype for Business Bluetooth Headset
  • PLT-202652-03-006         Plantronics B825 Voyager Focus UC Bluetooth Headset (No Stand)
  • PLT-202652-04-006         Plantronics B825-M Voyager Focus UC Lync/Skype for Business Bluetooth Headset (No Stand)

Plantronics Voyager Focus UC

It has phenomenal talk time (up to 12hrs) and listening time (up to 15hrs).

Let’s focus on Plantronics Smart Sensor technology. It’s a very cool feature. As I wrote before, Smart Sensor means the headset knows when you are wearing it and when you are not. Here are some applications on how Smart Sensor Technology is beneficial:

  • Your mobile device rings and you aren’t wearing headset, simply answer call by putting headset on.
    • Let’s say headset wasn’t quite in reach, that’s okay…answer call via mobile device. If you find it will be longer call, put the Voyager Focus on and the audio automatically transfers from mobile device to headset
  • You’re streaming media, you can pause by removing headset and resume by putting it back on.
  • Maybe you need to sneeze, cough or co-worker taps you on the shoulder to ask quick question while you are in a call, if you take headset off, it automatically mutes the mic so the party on the other end doesn’t hear.
  • In our Microsoft Lync/Skype for Business. If you take headset off, it will change your Presence status to “Away”. Voyager Focus UC will also answer Microsoft Lync/SfB call by putting headset on.

Use sensors: Smart sensors respond when you put on or take off your headset.

With active sensors Putting on headset will: Taking off headset will:
Call Answer the call Mute the headset
Music/Media Resume music/media (if playing previous to taking off)* Pause music/media (if playing)*
Mute Unmute if on an active call Mute if on an active call

NOTE *Functionality varies by application. Does not function with web-based apps.

Reset sensors

You may need to reset the sensors in the Plantronics Voyager Focus UC if they are not working as expected. There are two ways to reset the headset sensors. Choose:

  • With your headset powered on, charge your headset on the charge stand for 10 seconds
  • Press and hold both the Mute and Play/pause buttons for more than 4 seconds until the LEDs flash purple twice, being careful to not touch the earcup padding or allow it to come in contact with surfaces

Disable sensors

You can disable your headset smart sensors several ways:

  • Manage sensors through Plantronics Hub software
  • Hold both the Mute and Call buttons for more than 4 seconds until the LED flashes purple then red. Repeat to reactivate; the LED flashes purple then blue.

NOTE Sensors cannot be disabled while streaming audio.

To learn more about the Plantronics Voyager Focus UC or to find out if this solution is right in your environment, contact us.


Jabra Evolve 75

Jabra Evolve 75

It’s no secret that noise and interruptions negatively impact productivity. Especially in open office environments. The chatter from neighboring colleagues can sometimes be too much when you are trying to complete a project. Enter the Jabra Evolve 75.

This wireless headset comes in four variants:

Jabra Evolve 75

What’s in the box (Charging Stand Variant): Quick Start Guide, Jabra Evolve 75 headset, Jabra Link 370 USB adapter, charging stand*, protective travel case, USB cord (allowing for use while charging)

Set Up and Use on PC: Setting up the Evolve 75 was very simple. Please note microphone can only be worn on the right side. First, charge unit 2.5hrs. Download Free Jabra Direct software (Individual desktop), Jabra Suite for Mac or Jabra Xpress (mass deployment). Plug Jabra Link 370 USB dongle to a PC USB port (allow device drivers to install). Turn on the Jabra Evolve 75 headset. Should connect almost immediately. You can adjust settings via Jabra Direct:

Jabra Evolve 75

You can also check the status of Link 370 Dongle via Jabra Direct.

To pair to a mobile device via Bluetooth. First, go to your mobile device Bluetooth menu and place into discovery mode. Slide and hold on/off/Bluetooth switch on Evolve 75 to Bluetooth symbol for 3 seconds to place Evolve 75 into pairing mode. Select Jabra Evolve 75. You should be “Connected”.

To mute Evolve 75 simply lift boom arm up. There’s a little button with microphone icon on right speaker towards the top. When I pressed this button, it activated Siri on my Apple iPhone.

Active Noise Cancellation button allows you to eliminate unwanted background noise. The Listen-in feature allows you to listen to your surroundings without taking your headset off. To activate “Listen-in”, press button on the left speaker.

There is an integrated busy light that kicks on when you are in a call. It’s important to educate employees and inform them that when lit up red, the person is “busy” and should not be disturbed. You can manually activate busy light by pressing volume up/down buttons simultaneously. If you are not on a call but need to concentrate. I’ve toured some “open office” environments and a solution like the Evolve 75 is a must in many use cases.